Oil Printing: Updating a Classic Process
As photography became more mechanical by the 1890’s many photographic artists felt the need for a photograph to show the hand of the artist. Printmaking methods such as gum over platinum, oil and bromoil were widely used by the photographers to achieve this effect. These methods of printmaking were known as the pictorial movement. This style of photography was popular till it was driven from the scene by “straight” photography typified by Adams and Weston. With the turn of another century, photography now is not only mechanized but digitized and again the photographic artist is looking for methods to show the artist’s hand. Oil printing is a contact print process requiring a negative the size of the final print. The combination of digital capture and the production of a digital enlarged negative with the oil print process allow the photographic artist to utilize the best of the digital world and produce a handmade unique print.
History
The oil printing process has it’s origins in the beginnings of photography. Alphonse Poitevin’s original patent in 1855 described not only the carbon printing process but also oil printing. Poitevin found that a gelatin mixed with a dichromate became light sensitive. If the sensitized paper was placed in contact with a negative and exposed to sun light, an image was formed. Dark areas of the image would accept an oil based ink while in the lighter areas the gelatin was hardened and would not accept the ink.
Paper
The type of paper used is part of the artistic process of oil printing. There is a wide variety of papers available with different surface textures and with different colors. Some work better than others and experimentation is part of the process. I have found that watercolor papers work better than papers designed for etching. Most watercolor papers come in three surfaces: rough, cold press and hot press. Hot press is very smooth with little surface texture and is useful for images with significant detail. Cold press has some texture but not as much as rough. Watercolor paper also comes in different thicknesses. The thickness is described as the weight of the paper and recorded either in pounds or grams. A thin paper is 90 lbs and a thick paper is 300 lbs. An oil print on 300 lbs paper is wonderful hold, it is much more expensive. A 140 lbs paper is easy to use and looks great. While most any high quality watercolor paper will work for oil printing, I prefer using 140 lbs Fabriano Artistico in either hot or cold press.
Watercolor paper comes in a standard size of 22x30 inches and has either two or four deckled edges. Always tear the paper with a straight edge rather than cutting with a knife. The torn edge has a better look than a cut edge. Watercolor paper has a front and back. You want to use the front side so be prepared to mark the back side with an “X”. The easiest way to determine back from front is look at the watermark. When the water mark reads correctly you are looking at the front.
Preparing the Gelatin
The basis for the oil print is a high quality layer of gelatin. While some suggest that a food gelatin such as Knox unflavored gelatin can work, I find that a gelatin designed for photographic use will give a more consistent result. Gelatins are given a hardness rating, the Bloom scale. You will want to find a gelatin with a Bloom rating of around 250. I find that two coats of a 6% gelatin solution works well. To make a 6% gelatin solution, weigh out 60 grams of the gelatin and slowly add the dry gelatin with constant stirring into 900cc of distilled water. Add just small amounts of the dry gelatin at a time and avoid clumps which are very difficult to break up. Use a container that you can heat such as a glass beaker. Once all the gelatin has been stirred into the water add enough water to make one liter. The gelatin granules need time to absorb as much water as possible. Not allowing enough time will cause the gelatin to cook rather than melt when the temperature is raised. Allow at least 30 minutes for the gelatin to swell.
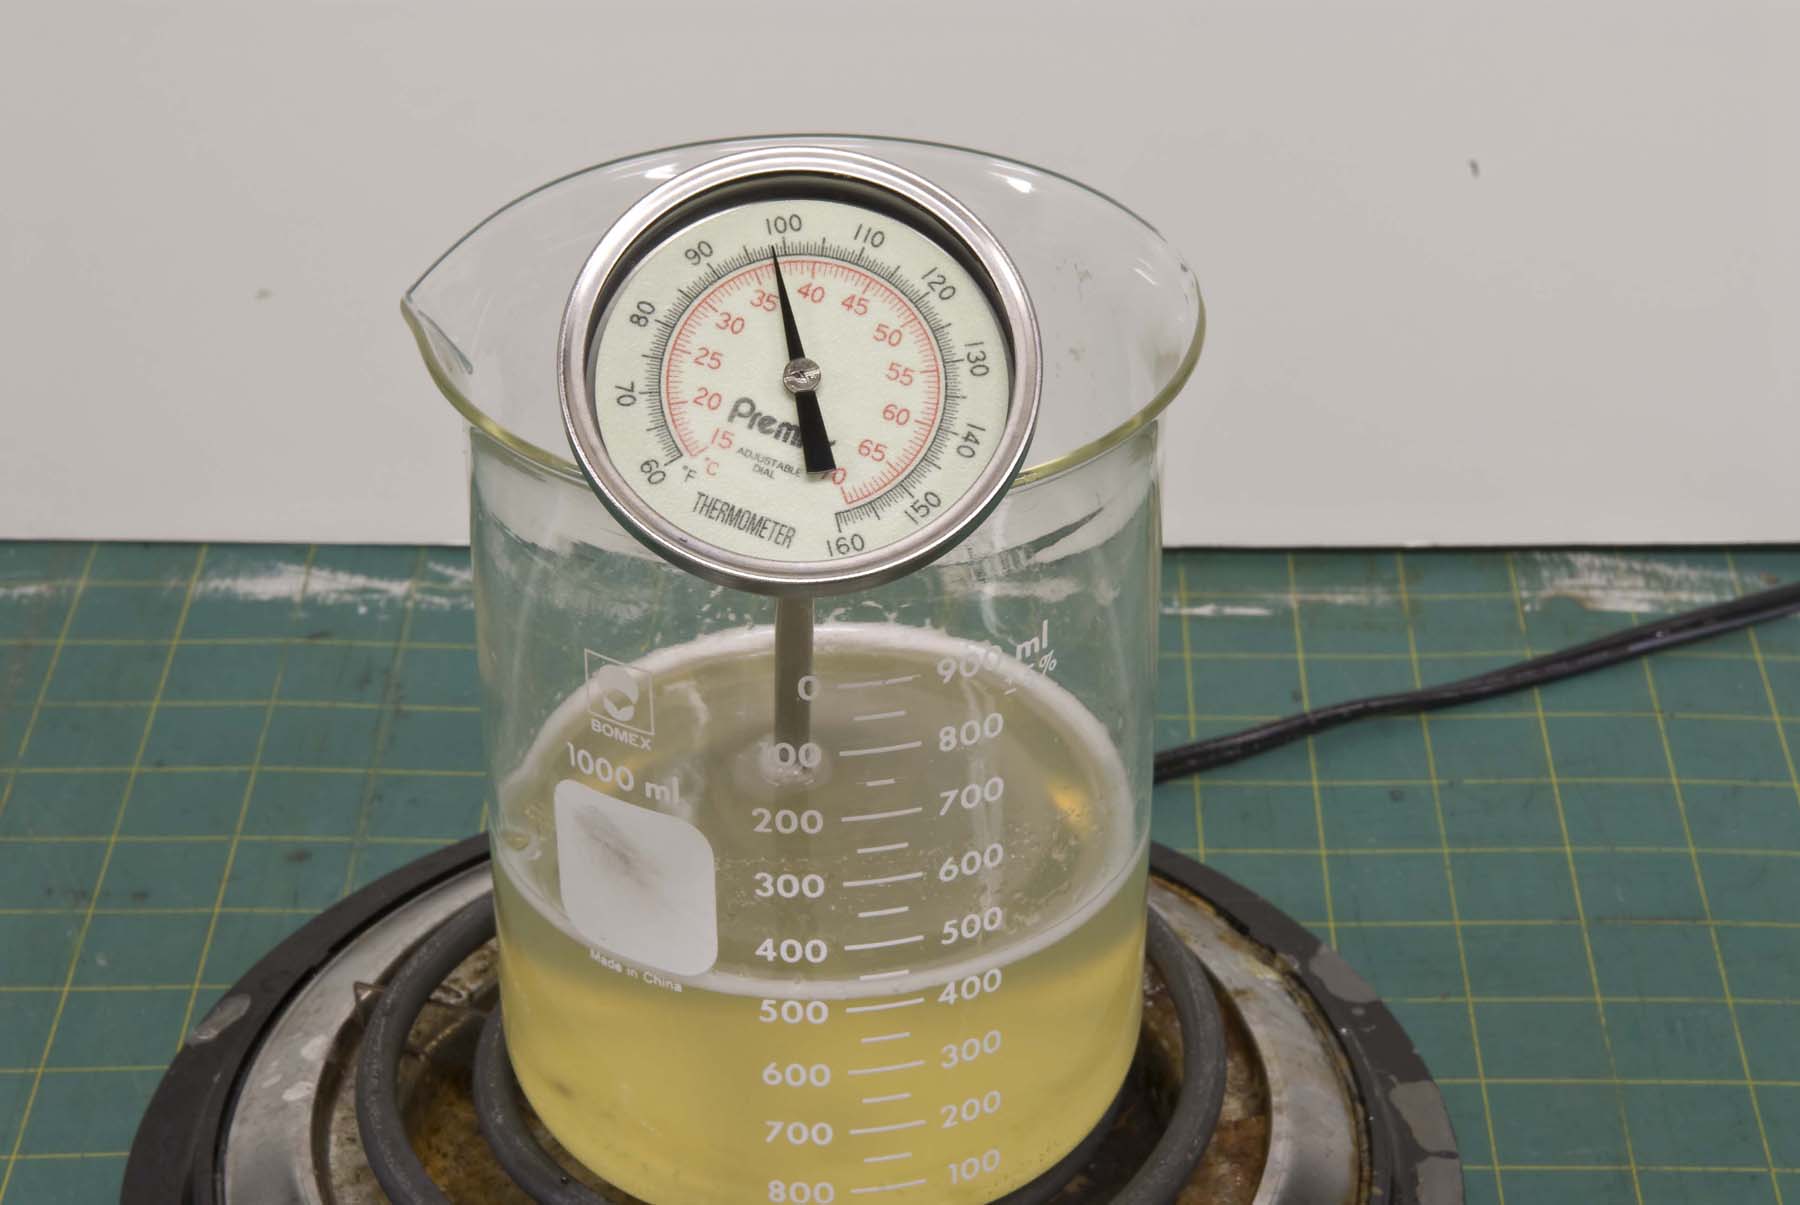
To melt the gelatin place the beaker on a hot plate set at a low temperature. You want to slowly raise the temperature to around 120F but certainly no higher than 130F. Monitor the melting with a thermometer. As the temperature increases you can see two levels in the mixture. The lower level is clear and warmer while the upper level is cooler with unmelted gelatin. Once the solution is completely clear, the gelatin is ready to use.
To the warm gelatin add 5ccs of 1% potassium (or chrome) alum. Alum will harden the gelatin. While this sounds contradictory to the oil process without this additive the gelatin will not evenly adhere to the paper and will be so soft that it is easily damaged. This is a crucial step and I was not able to get consistent results before I added this small amount of hardener to the process.
Coating the Paper
To get an even gelatin coat you must be able to keep the gelatin at about 110F. I have found that the paper needs to be immersed in the gelatin for at least two minutes to get an even coating. Using aluminum sheet pans made for baking are idea for gelatin coating. The pans come in two sizes; the full sheet can fit a piece of paper 14x20 inches while the half sheet pan will easily fit an 11x14 inch sheet of paper. The half sheet pan easily holds one liter of gelatin. Place the sheet pan over two hot plates or a warming tray set at low heat. Pour the warm gelatin into the pan and monitor the temperature with a thermometer adjusting the hot plates as necessary. Slide the paper into the gelatin with the front side up. Make sure that the paper is completely submerged. Rock the pan slowly with no abrupt movements. Avoid making air bubbles. After two minutes, tilt the pan so the gelatin puddles in one corner.
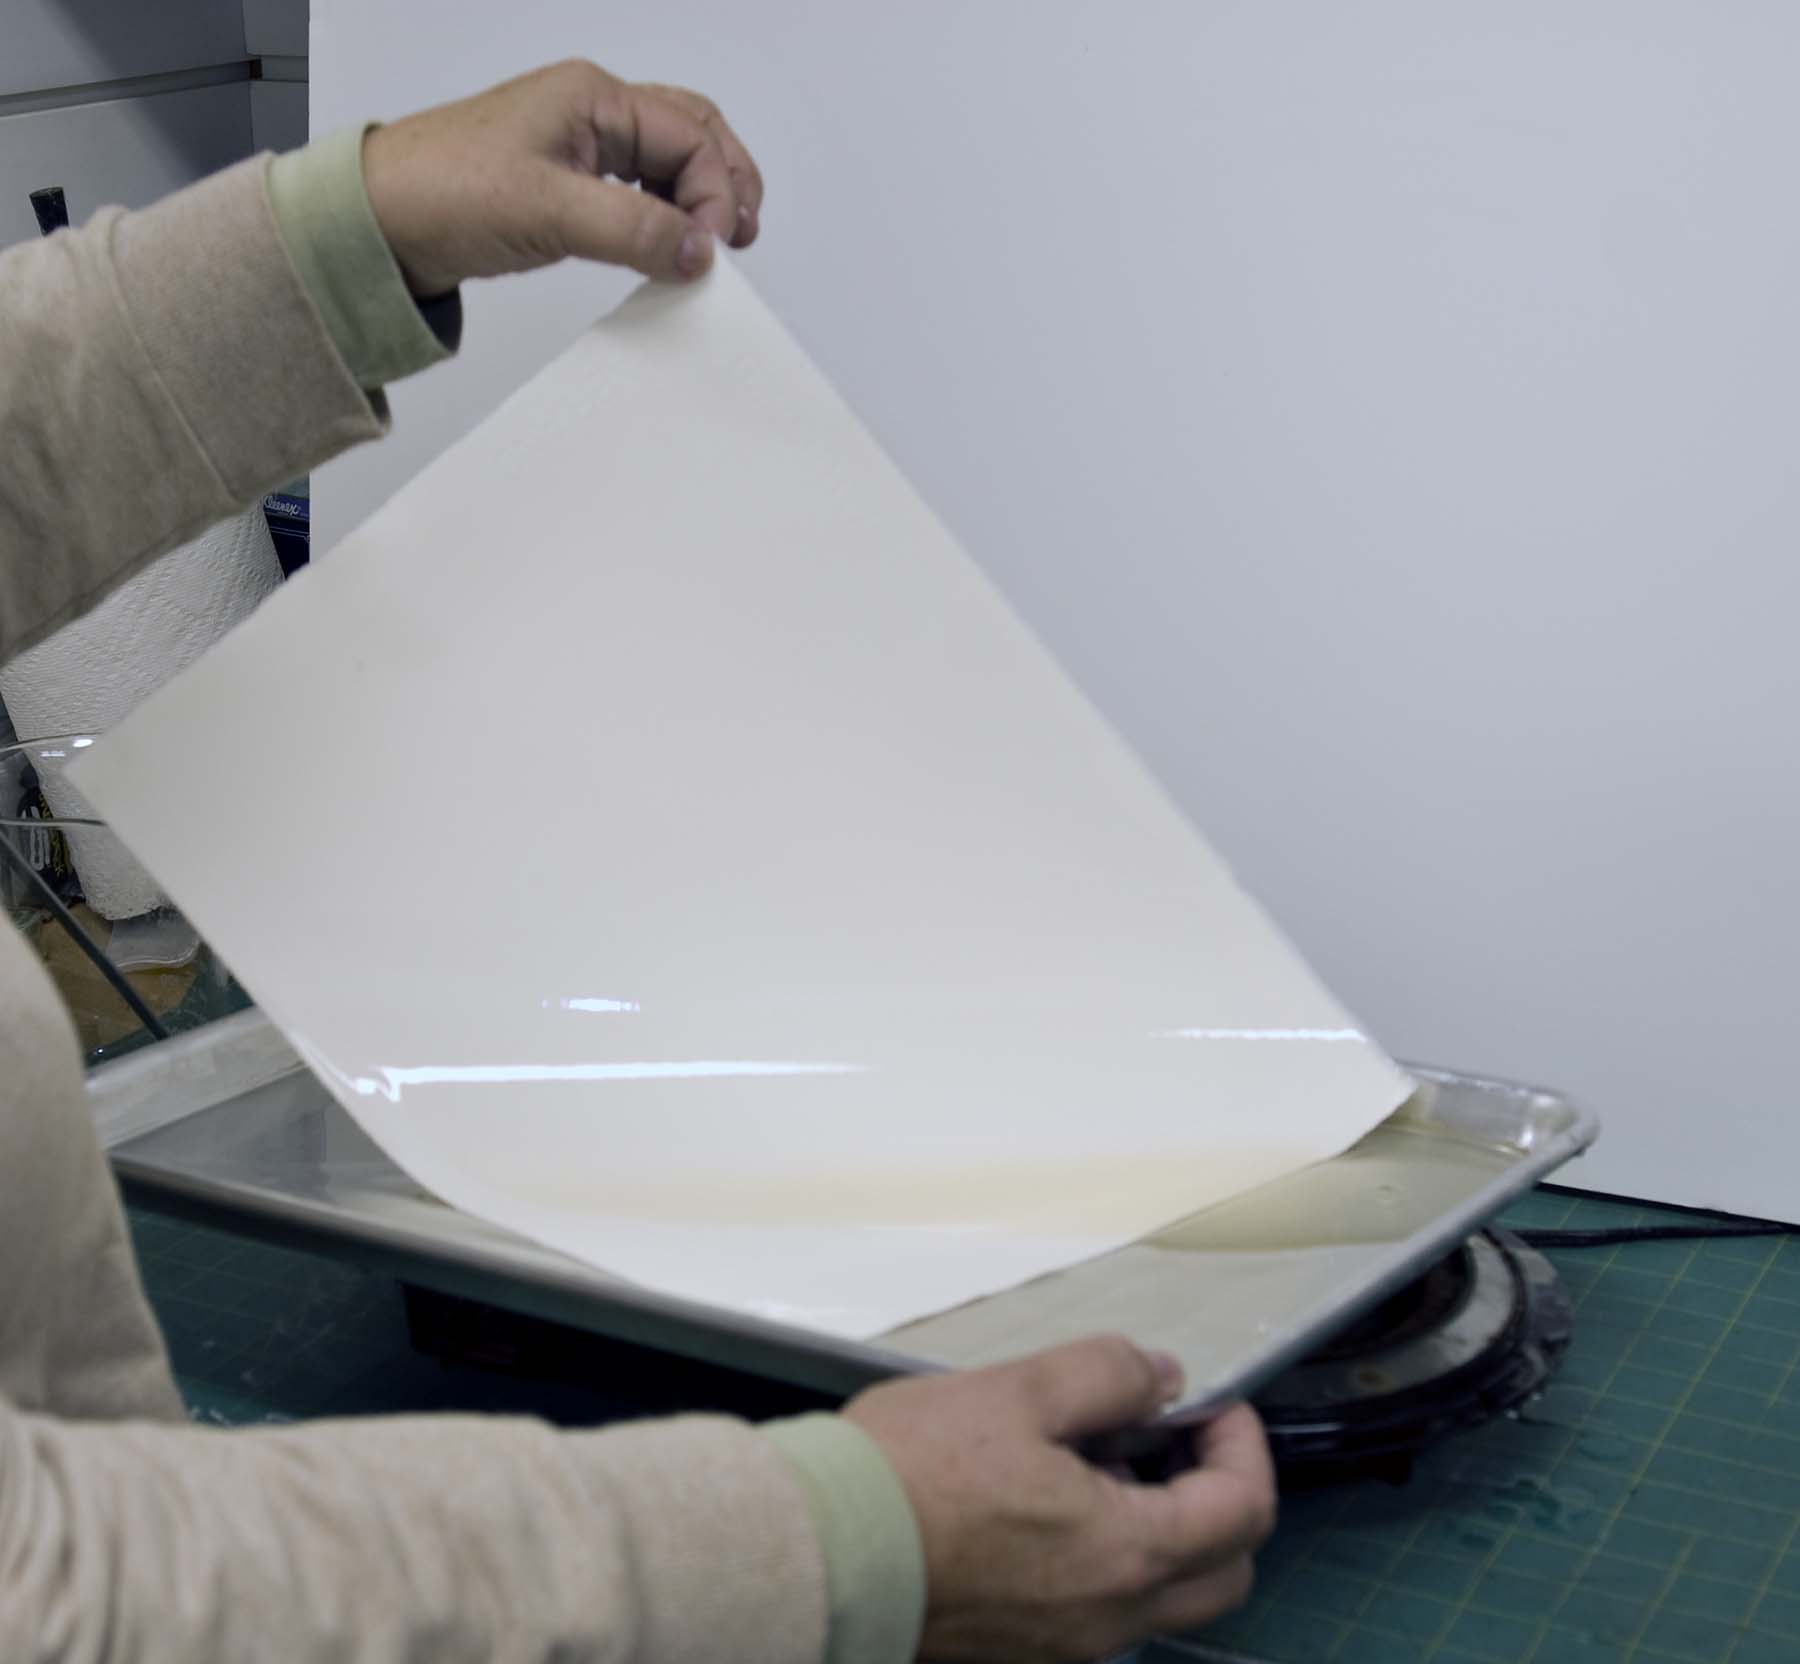
Grab the edge of the paper that is in the puddle of gelatin and slowly move the paper up and out through the puddle. If bubbles occur put the paper back into the pan and repeat. Allow the excess gelatin to run off into the pan. To the back of the paper run a plastic rod to remove the gelatin on the back. Do not use the rod on the front. Hang the paper to dry in a dust free area. The gelatin should be completely dry before a second coat is applied. To apply the second coat re-heat the gelatin and repeat the coating process. Coated paper will keep for long periods of time.
Sensitizing the Paper
Either potassium or ammonium dichromate can be used as a sensitizer. Ammonium dichromate is faster and requires less exposure while potassium dichromate creates a lower contrast image. I use 3% ammonium dichromate. Dichromates are toxic and should be used with caution. They are most toxic as a dry powder. To avoid exposure I mix up a liter of stock solution which can be used for hundreds of prints rather than mixing the dry powder fresh for each print. The stock solution lasts indefinitely. When I weigh out and mix the dichromate I use a dual cartridge respirator and gloves. Whenever I work with the dichromate solution I wear gloves.
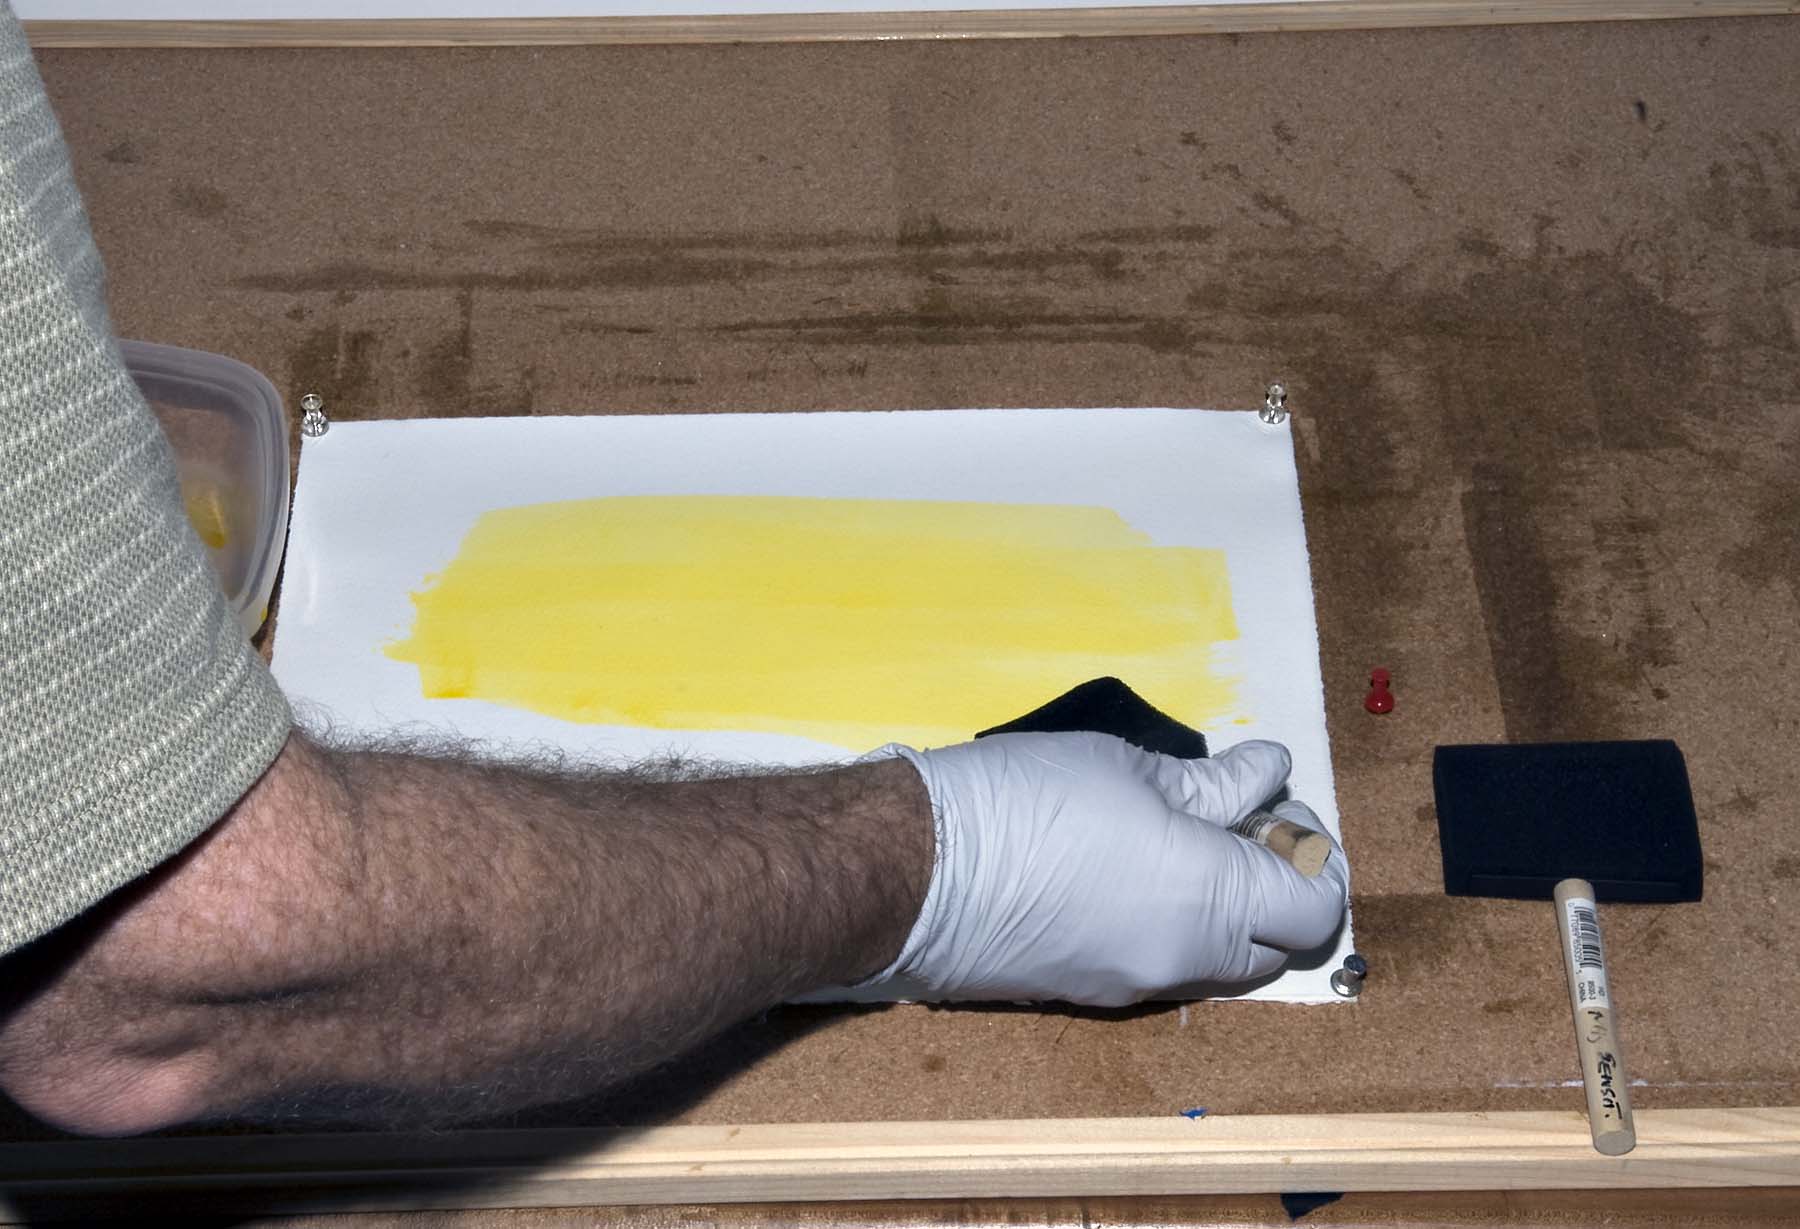
The liquid sensitizer is not very light sensitive and the sensitizing process can be done under a yellow “bug” light or in subdued room light. Avoid exposure to sunlight or fluorescents. Pour a small amount of the 3% ammonium dichromate in a shallow dish. Using push pins secure the paper to a corkboard. Dip a 2 inch foam paintbrush into the sensitizer and pain the sensitizer onto the paper. Use a dry 3 inch foam paintbrush to smooth the sensitizer.
Avoid puddles and do this quickly but smoothly. Hang the paper to dry for 30 minutes. Use the sensitized paper within the next 24 hours or the gelatin will harden even without exposure. The paper becomes light sensitive as it dries and should be hung in a dark area
Digital Negatives
Digital negatives are ideal for oil printing. You will save yourself a lot of trials and mostly errors if you start off by establishing a correction curve which fits your particular method of printing. . To do this print out a step tablet on the transparency material you use. I recommend Pictorico OHP. Expose the tablet on a piece of oil paper, wash, and ink as usual. Once the oil print / step tablet is dry scan the print into Photoshop. Apply a slight blur to the image so the irregularities of the ink are merged. Move the cursor over each step and read the “K” value from the Photoshop info palette. Write down the numbers in a table with two columns. The first column is the input value and the second is the output values. The input is the original value of the step tablet and the output is the one from the oil print. This data shows you how the process changed the step tablet from Photoshop image to oil print. You want the correction curve to do the opposite. Switch the headers of the two columns in the data table. This becomes the data points so you can build the correction curve.
Open the curves window and make sure that the curve values are measured in percent. Click anywhere on the line and enter the values in the input and output boxes. Continue to click on the curve and enter more points from your data table. You need to enter about 15 points, more at the extremes than in the middle to create an accurate curve. Once complete click on the save button and label this curve “oil print curve”.
The proof is in the print. Open another digital image. If it is color convert it to B&W by your usual method. Adjust the image with levels, curves, dodging and burning as necessary. I usually add a white border to the image which will become a black border mask for the negative. Flatten the image and apply the correction curve you previously created. Sharpen as you would for any digital print and then invert the image to the negative.
Printing depends on the printer. I have been using an Epson 2200. I turn off color management in color preferences and use the Photo Black ink not the matte black which will not stick to Pictorico OHP. For Pictorico OHP the settings I use are the following: media type: enhanced matte; Superfine 2880 dpi; color management: ICM: No color adjustment
Exposing and Development
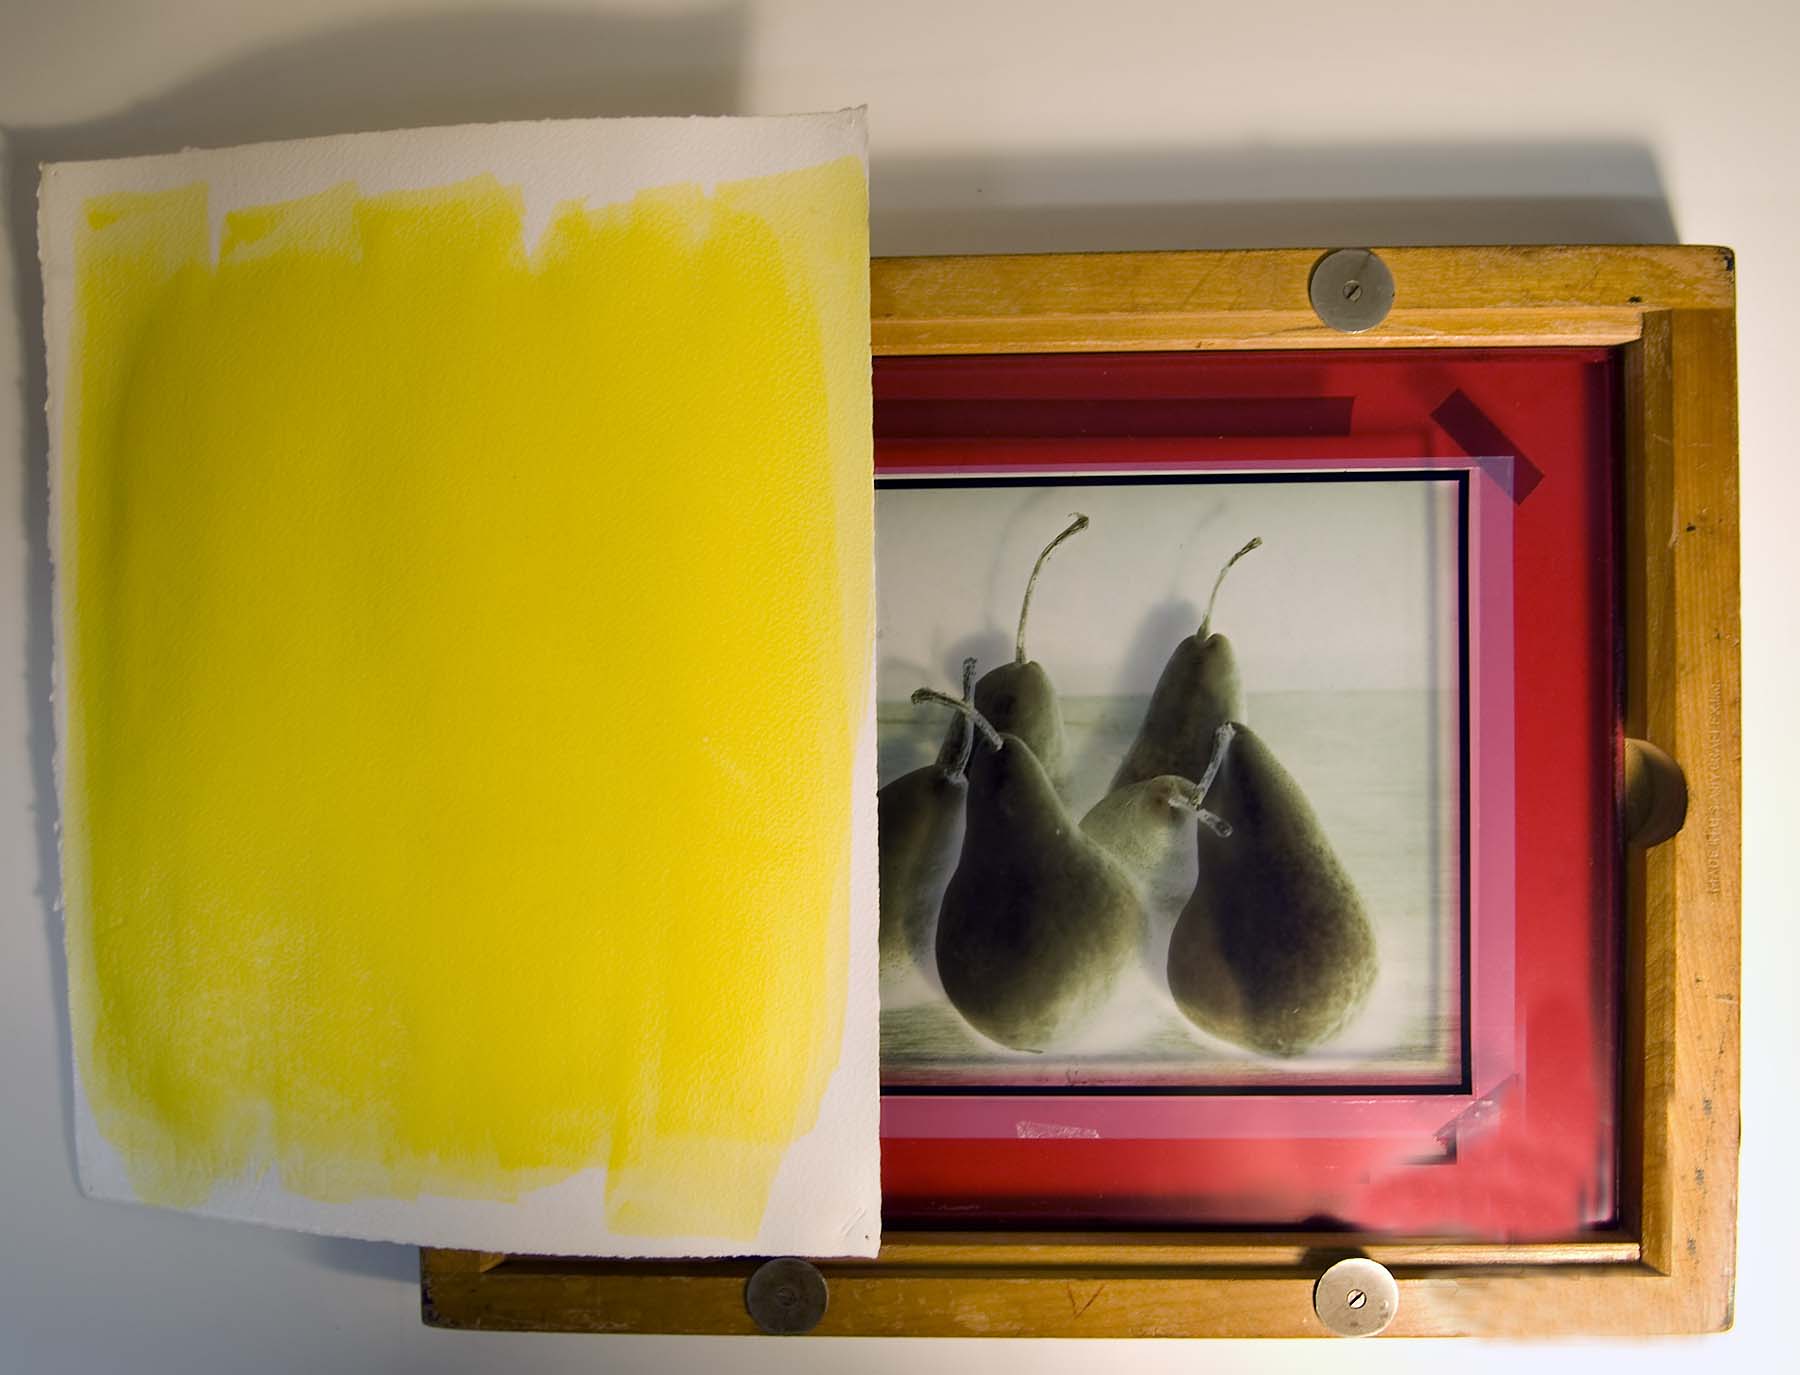
Now that you have your sensitized paper and digital negative place them in a contact print frame emulsion to emulsion.
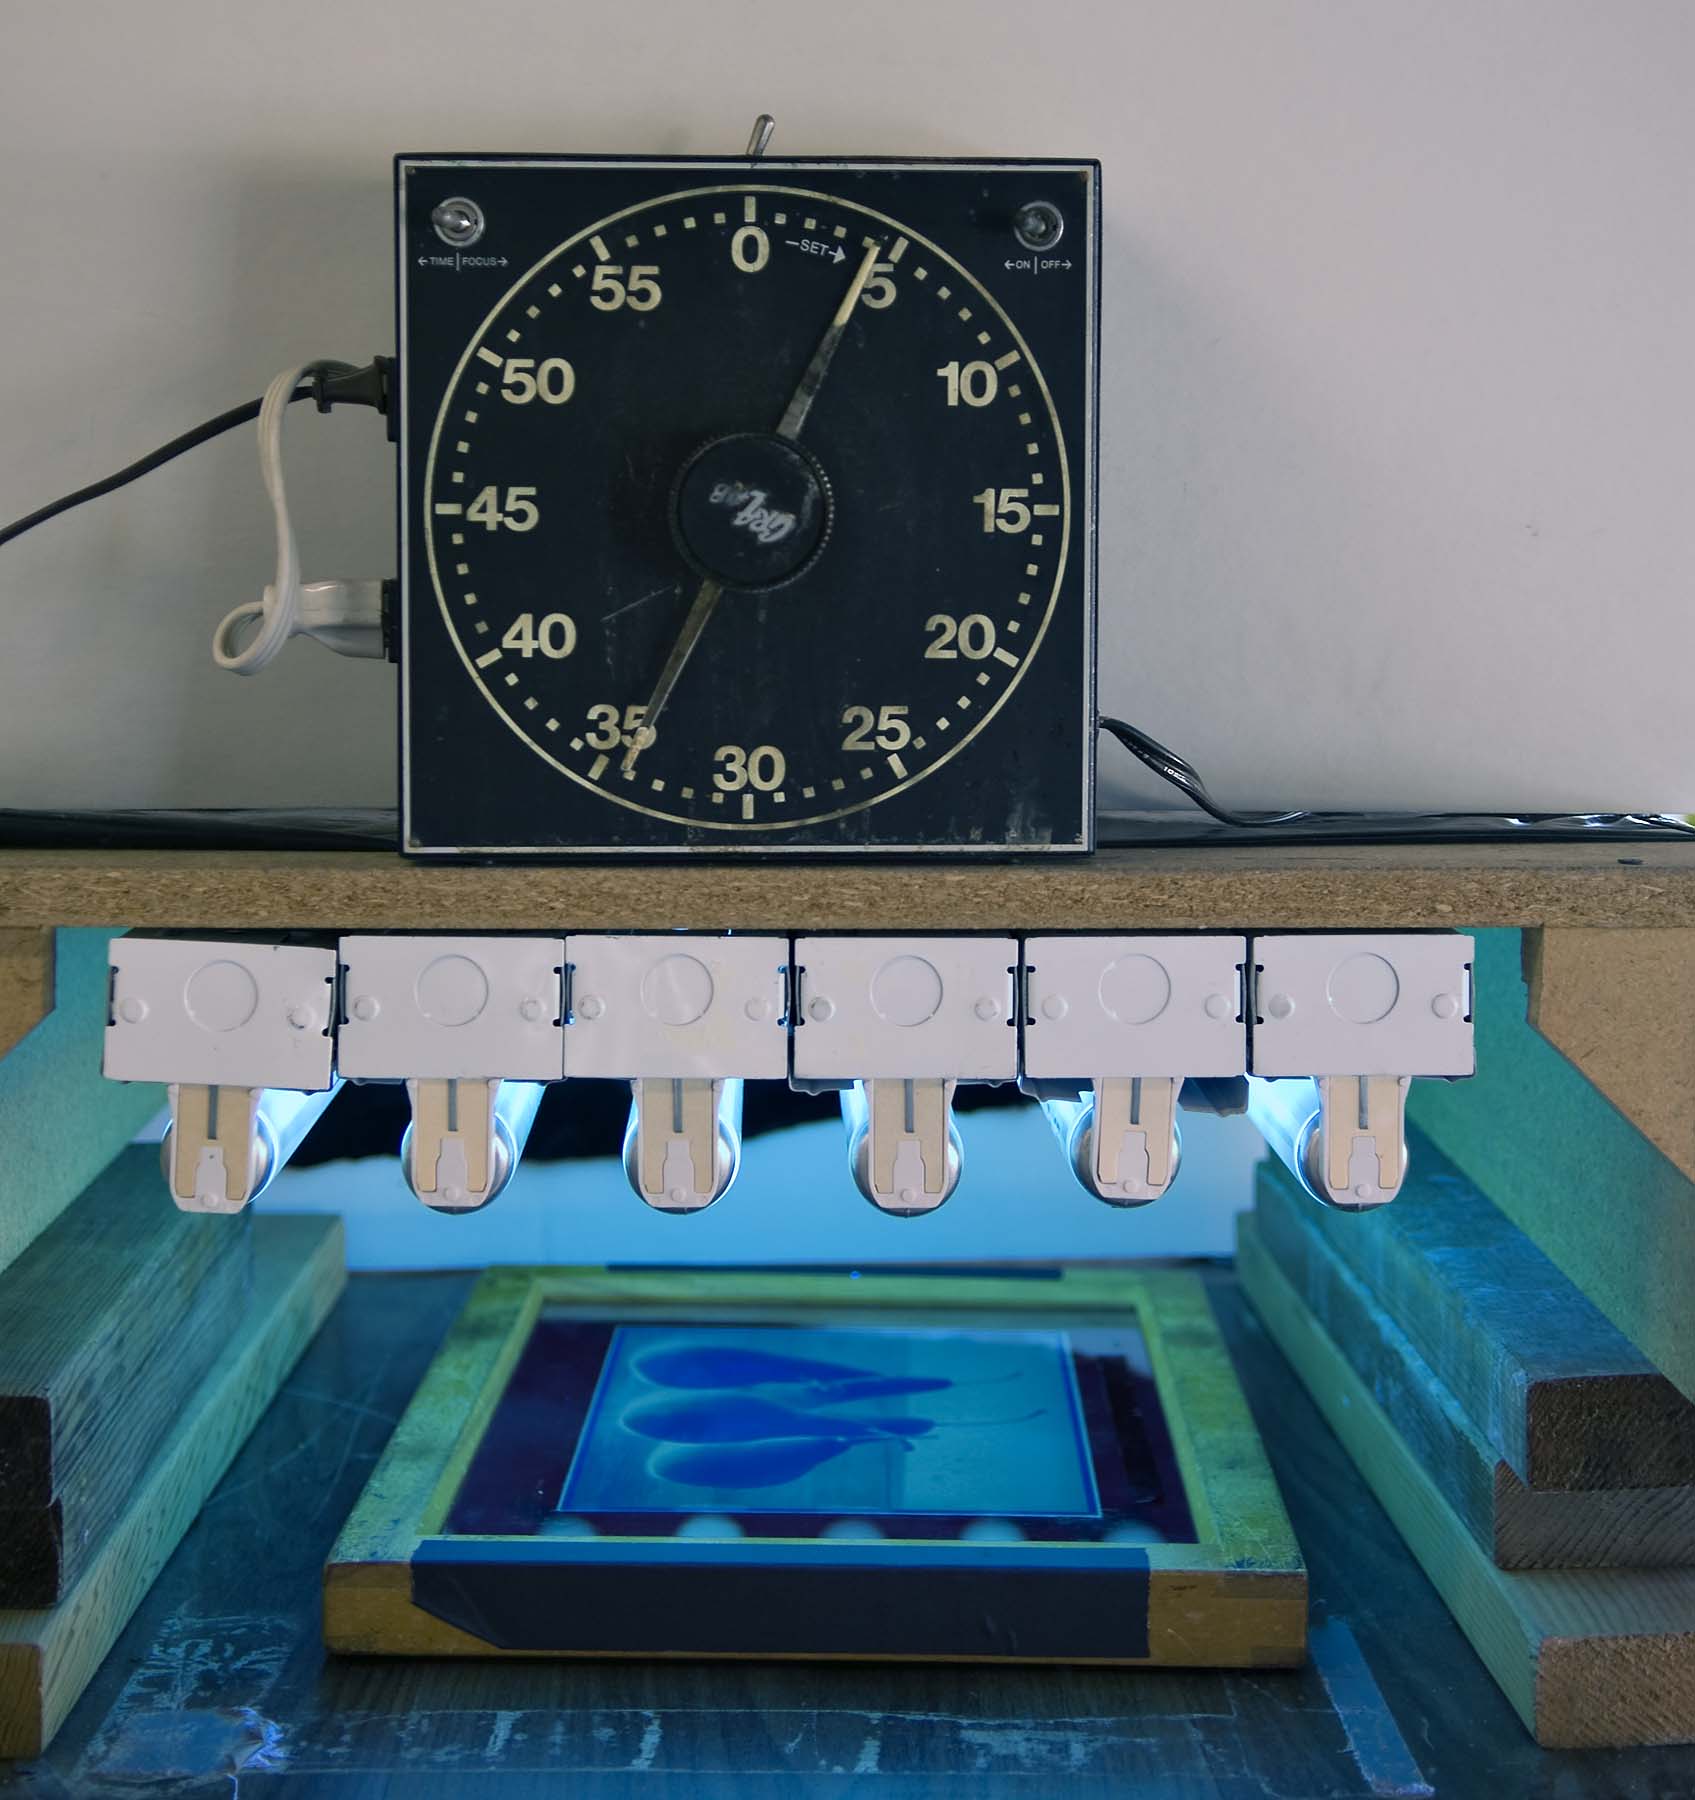
The print needs to be exposed to a UV source. The cheapest source is the sun but it’s somewhat unpredictable. An inexpensive homemade UV exposure unit can be built from under cabinet light fixtures and BL bulbs (GE 20 watt F20T12-BL). With my exposure system of 6 bulbs the basic exposure is 12 minutes when 3% ammonium dichromate is used.
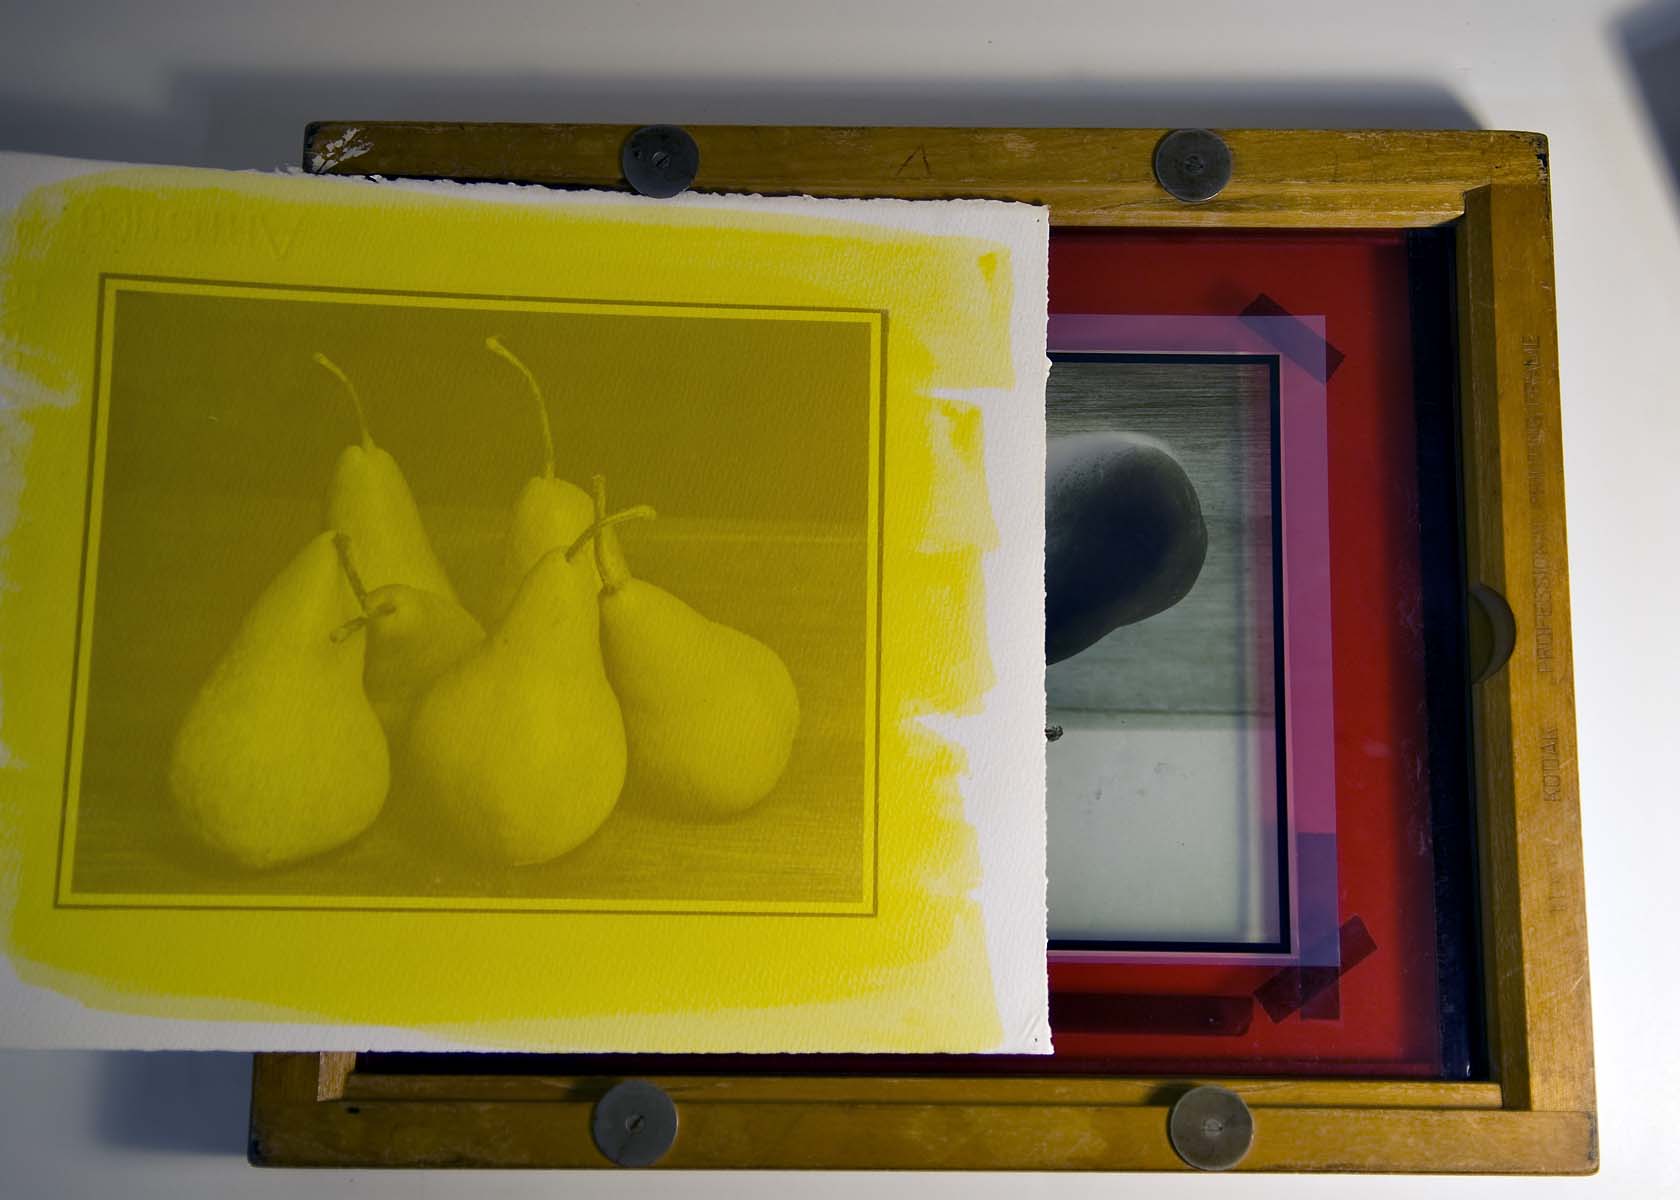
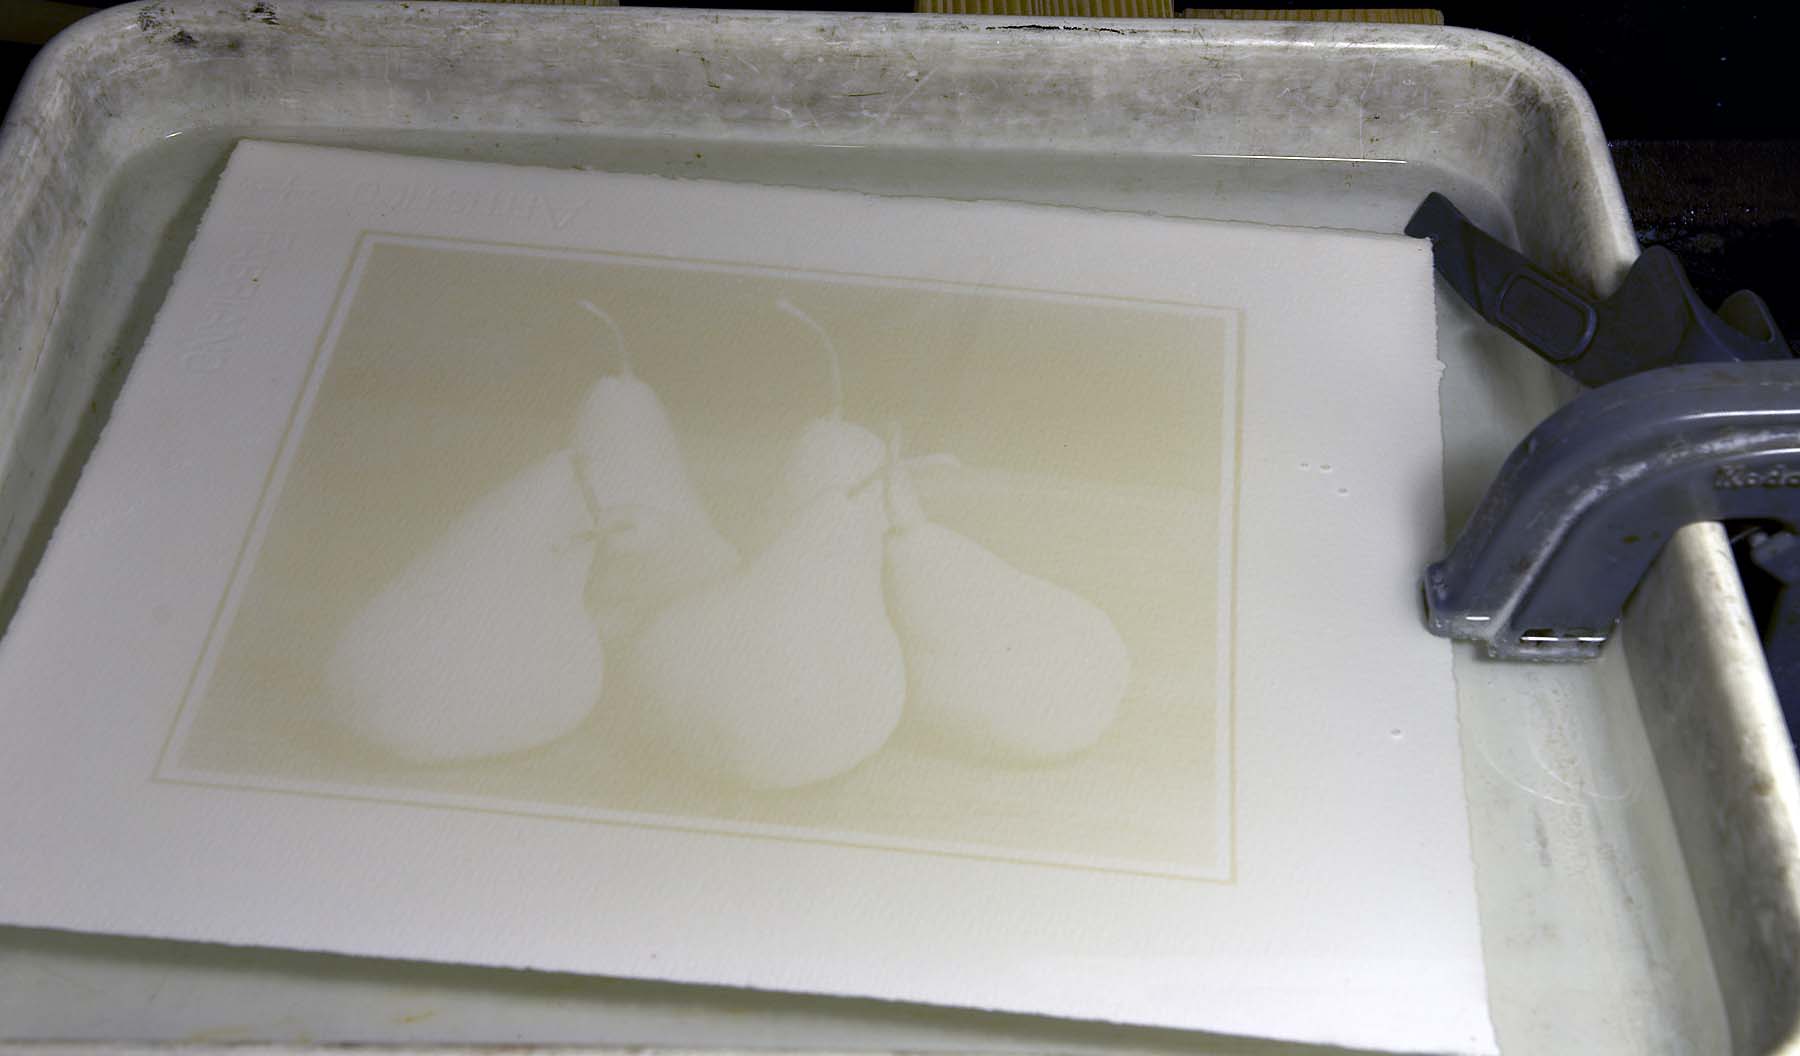
After exposure an image is seen on the paper. If you can see detail in the highlights the exposure is correct.
The paper is developed by washing in running water for 1 hour to remove the unexposed dichromates.
Inking
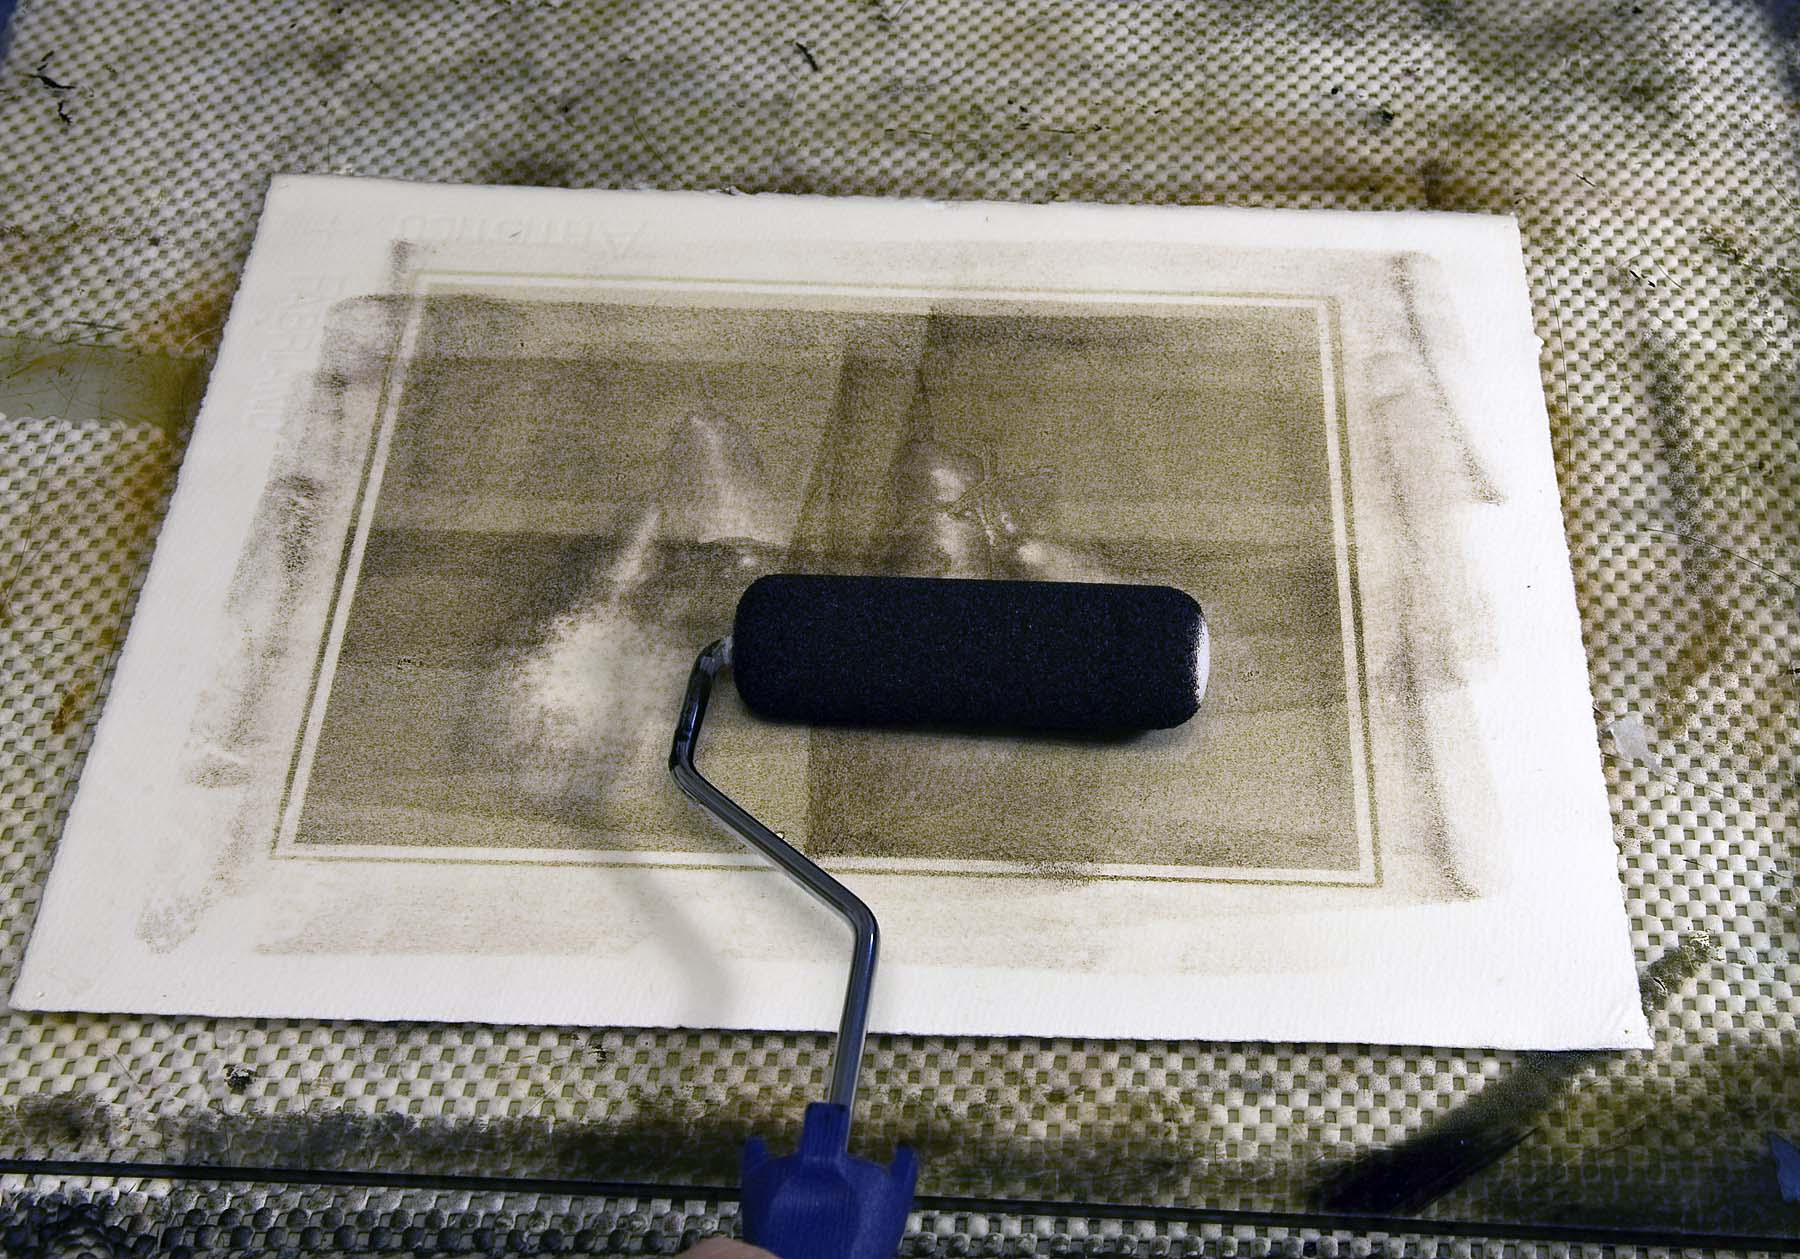
After an hour of washing the yellow dichromate stain is mostly gone and what remains is a faint image on the paper. At this point the exposed and developed paper is called a matrix. The matrix should be allowed to dry overnight. You can ink the print immediately but the ink will take a lot longer to dry than if you allow the matrix to dry. If the matrix has been dried, soak the matrix in water at 70F for 30 minutes. Remove the matrix from the water and place it face up on a piece of blotter paper and gently wipe the surface with a paper towel. You can feel the difference between the hardened and swollen areas of the matrix. Gently remove all the surface water. Lithography ink is used to ink the matrix. While there are many inks to choose from, a good one to start is Graphic Chemical & Ink 1803 which is a warm black ink. Remove a small amount of ink from the can and place on a smooth tile. Using a hard brayer or spatula, spread the ink out into a thin layer on the tile. The easiest way to ink the print is using a foam paint roller.
Roll the foam roller onto the thin ink layer. Try to get as even a distribution of ink on the roller. Roll the roller on a piece of scrap mount board to get rid of any clumps of ink and then slowly roll the roller over the matrix.
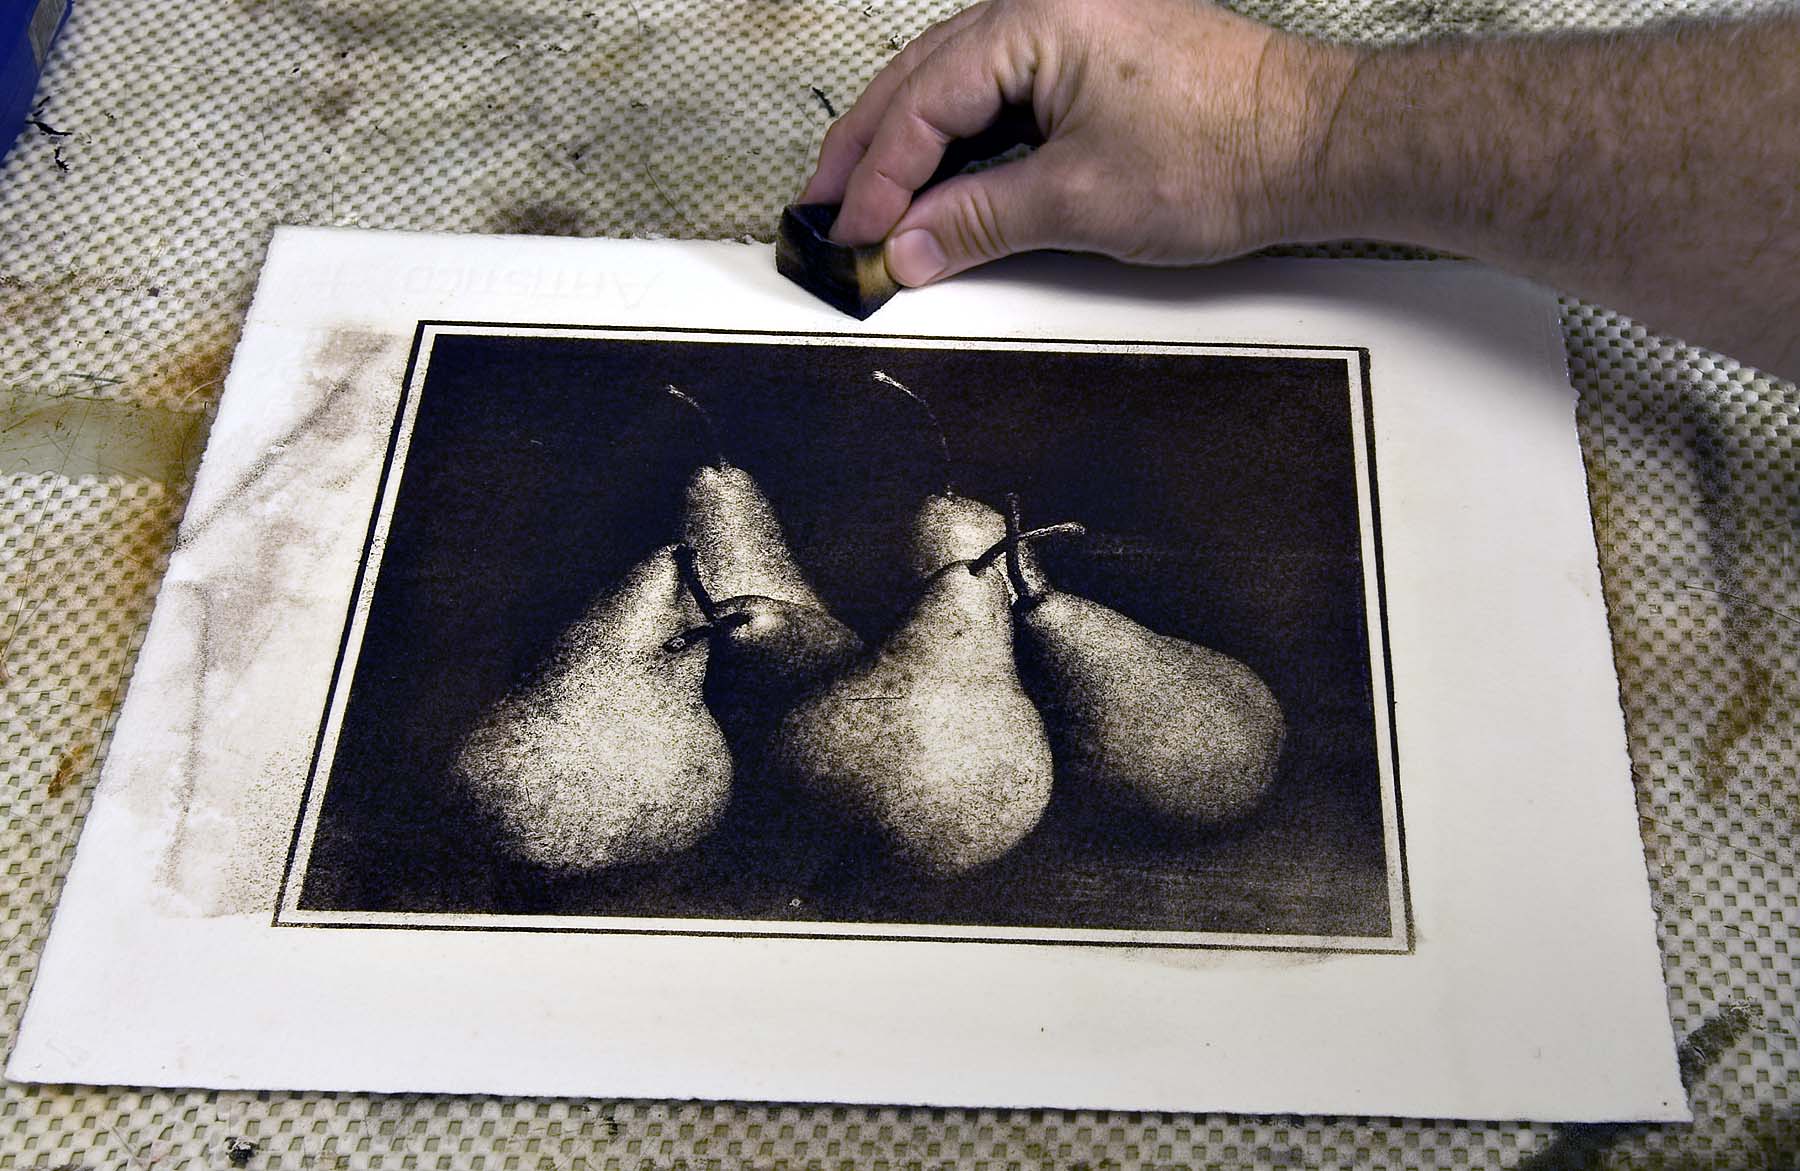
Slow movements puts ink onto the matrix while rapid rolling moves ink from highlights to shadows. Several light layers of ink are better than one thick layer. Slowly build up density. You can also add ink to areas with a brush. A bristle pastry or shaving brush works well. Go easy as the gelatin is fragile and it’s easier to add than remove ink. Ink can be removed by a “hopping” action of the brush. The edges can be cleared with a wet cosmetic sponge.
An oil print takes several days to dry, and remember the back of the print has gelatin which can stick to the drying surface. Print drying screens are a good place to dry oil print.
The foam brayer gives a very “photographic” appearance to the oil print while the use a brush gives a more stippled pictorial look. Using a brush is a bit more difficult than the brayer but offers much more control of the process. Using this method allows the digital photographer to create a handmade unique print.
Suppliers
Photo gelatin and chemicals
Artcraft Chemicals: www.artcraftchemicals.com
Bostick and Sullivan: www.bostick-sullivan.com
Watercolor Paper and Lithography Ink
Daniel Smith: www.danielsmith.com